In this tutorial i will show you how to create bootable USB of Linux Mint ( 16 Petra , but it works for other versions also ) in Windows, Linux and Mac OSX . Linux Mint 16 Is released few days ago with many new features and shiny interface . you can see more about Linux Mint new features and download Link in my previous post .
Requirements :
- At Least 8 GB USB ThumbDrive ( USB pendrive )
- Linux Mint 16 ISO ( Download Link )
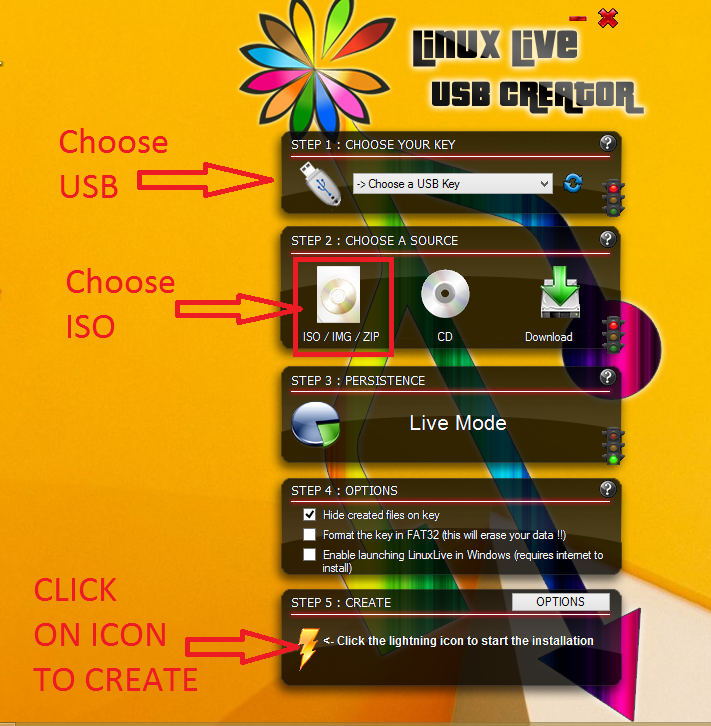
Creating Linux Mint USB in Windows :
Steps :
- Download and install LILI USB CREATOR ( it’s a small utility to simplify Linux USB creation )
- open lili USB creator and choose USB target Device
- choose ISO image
- uncheck ( Enable Launching Linux LIve in windows )

Lili USB creator - after that just unplug your USB and reboot your computer and choose USB boot to boot into Linux Mint
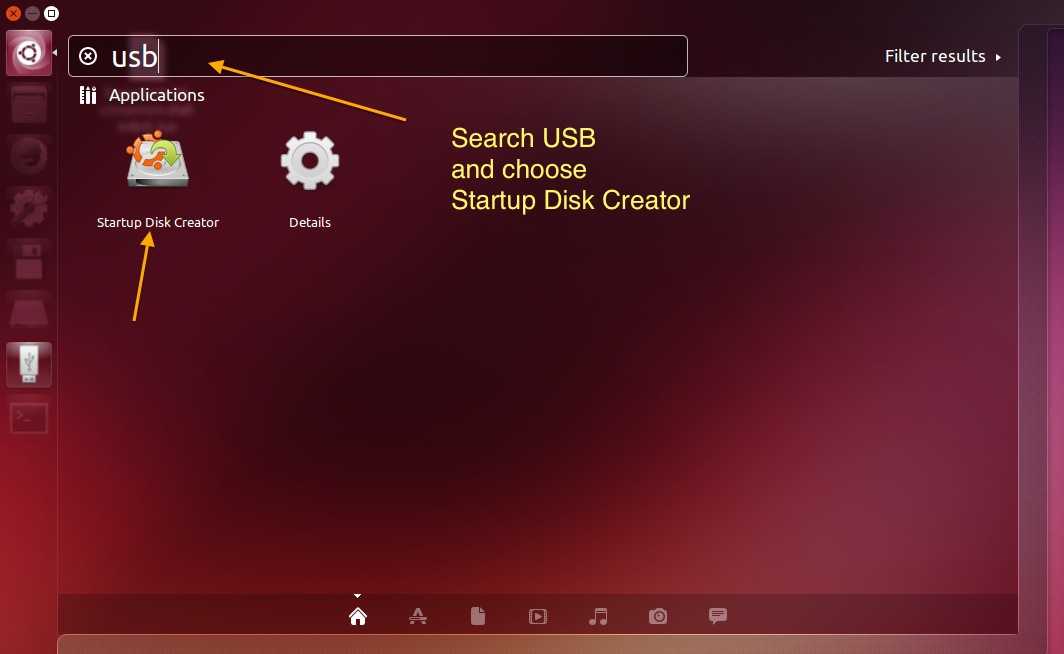
Creating Linux Mint USB in Linux ( Ubuntu in this case ) :
- Place your ISO on Desktop
- open Unity Dash ( just press super or windows key )[

first_startup_diskcreator
](/wp-content/uploads/2013/12/first_startup_diskcreator.jpg)
3. search USB and choose USB disk creator
4. choose ISO image and target device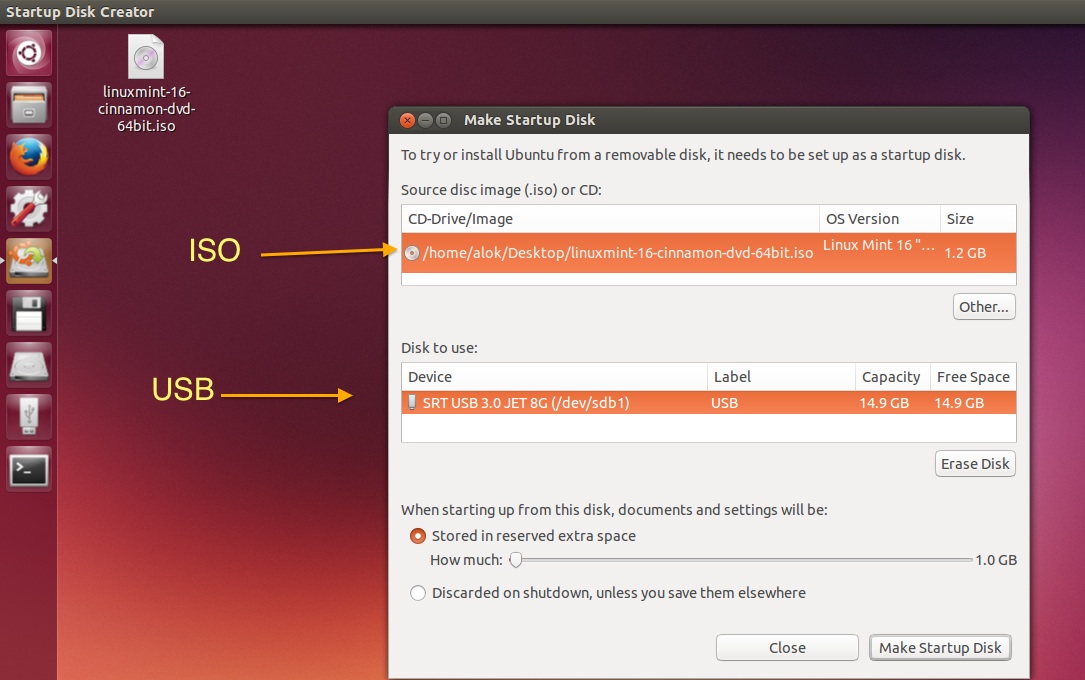
5. wait until it finish copying
6. remove your USB drive
7. Reboot and choose USB as first boot device to boot into Linux Mint
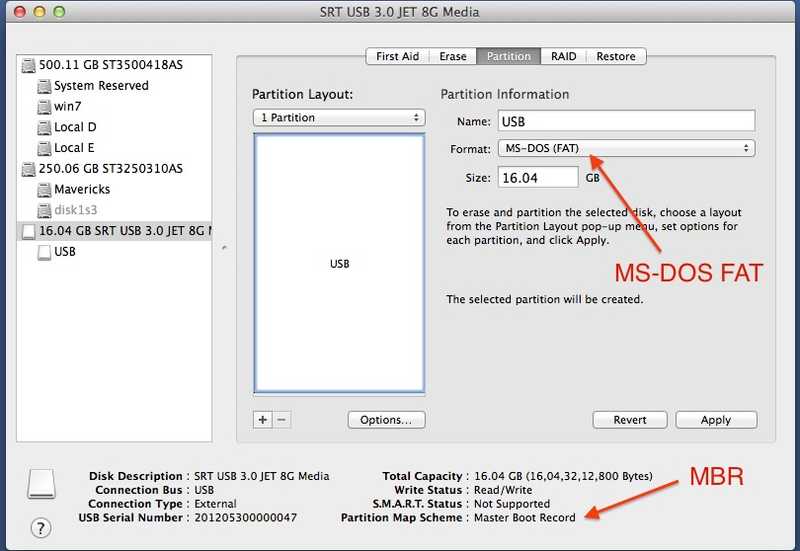
Creating Linux Mint USB in Mac :
- Insert Your Flash Drive
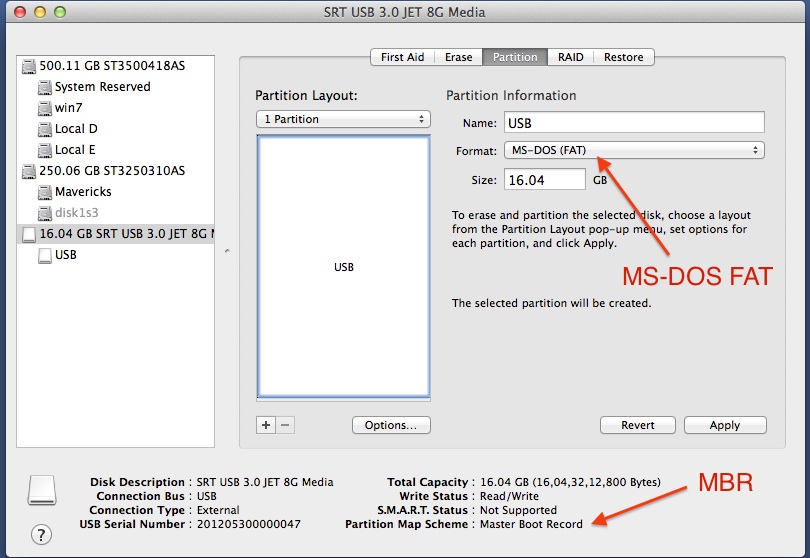
- open disk utility and format your USB drive ( fat32 , MBR partition )
FormatUSB - Place your downloaded ISO on desktop
- Open Terminal ( Applications>>Utilities >> Terminal
- Convert Your ISO to IMG
hdiutil convert -format UDRW -o output.img sourceLinux.iso
IN my case

[<img class="aligncenter  wp-image-2816" src="/wp-content/uploads/2013/12/Screen-Shot-2013-12-04-at-9.47.19-pm.png" alt="Convert ISO to IMG" width="817" height="487" srcset="/wp-content/uploads/2013/12/Screen-Shot-2013-12-04-at-9.47.19-pm.png 908w, /wp-content/uploads/2013/12/Screen-Shot-2013-12-04-at-9.47.19-pm-300x178.png 300w" sizes="(max-width: 817px) 100vw, 817px" />
](/wp-content/uploads/2013/12/Screen-Shot-2013-12-04-at-9.47.19-pm.png)
* Now Rename output.img.dmg ( it’s added by apple by default ) and remove DMG extension
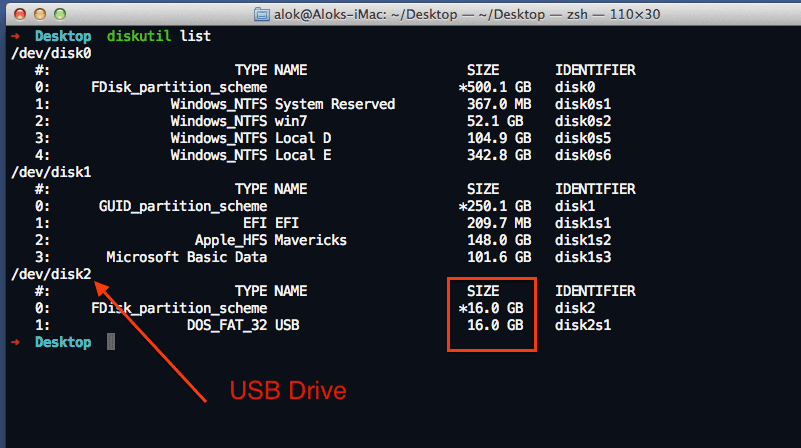
* Now list all available disk to identify your USB drive letter <pre class="codesBash">diskutil list</pre>
[ 
      * Now Unmount USB Using  diskutil unmountDisk /dev/diskX ( remove X with your drive number ) <pre class="codesBash">diskutil unmountDisk /dev/rdisk2</pre>

      * Now <pre class="codesBash">sudo dd if=linuxmint.img of=/dev/rdisk2 bs=1m</pre>

        <p style="text-align: center;">
          ( NOTE : Choose source img and target device carefully )
        </p>

        [<img class="aligncenter size-full wp-image-2821" src="/wp-content/uploads/2013/12/Screen-Shot-2013-12-04-at-9.53.29-pm.png" alt="Copying " width="704" height="163" srcset="/wp-content/uploads/2013/12/Screen-Shot-2013-12-04-at-9.53.29-pm.png 704w, /wp-content/uploads/2013/12/Screen-Shot-2013-12-04-at-9.53.29-pm-300x69.png 300w" sizes="(max-width: 704px) 100vw, 704px" />](/wp-content/uploads/2013/12/Screen-Shot-2013-12-04-at-9.53.29-pm.png)</li>

          * wait until it finish
          * Reboot your Mac and press alt/option key while the Mac is restarting to choose the USB stick.<img class="aligncenter size-full wp-image-2810" src="/wp-content/uploads/2013/12/Screen-Shot-2013-12-04-at-6.57.32-pm.png" alt="Final Linux USB booted" width="636" height="478" srcset="/wp-content/uploads/2013/12/Screen-Shot-2013-12-04-at-6.57.32-pm.png 636w, /wp-content/uploads/2013/12/Screen-Shot-2013-12-04-at-6.57.32-pm-300x225.png 300w" sizes="(max-width: 636px) 100vw, 636px" /></ol>

        Now that flash drive ready to boot and install Linux mint , if you fount this useful keep share ,  For supporting us just like us on Facebook or plus one on google plus