How to install Kali Linux in virtual machine step by step
Installing kali linux( backtrack 6 ) is not much harder as it was in down 1,2,3 versions of backtrack but anyway if you are stuck some where this step by step guide to install kali linux under virtual machine . why virtual machine ? because it gives you a safe environment to play and explore without damaging your physical hard drive , or any data loss what you should know before continue :
- basic knowledge of virtual machine’s
- basic knowledge of networking concepts ( TCP IP )
- basic linux or any *nix ( if you ever worked on Linux then you are good to go )
- time and patience
what is required :
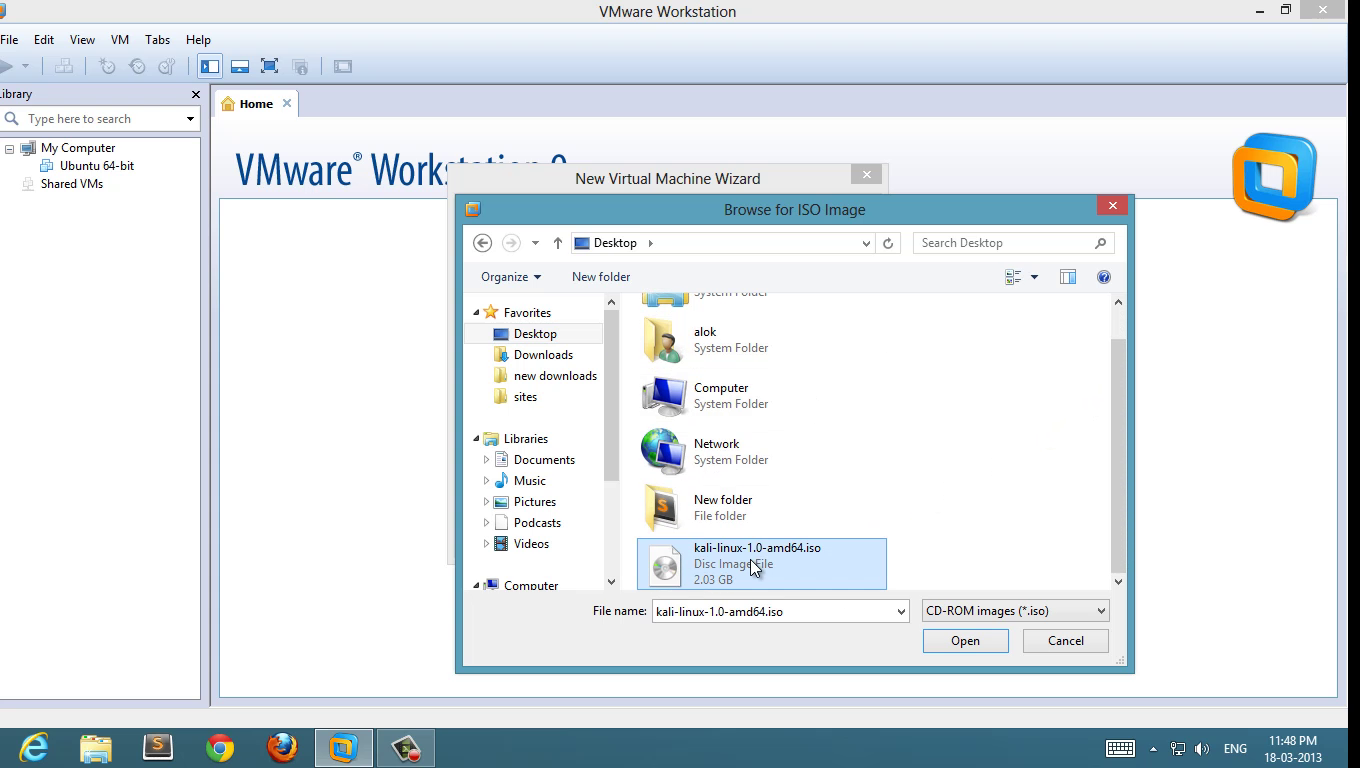
- Download Kali LinuxISO
- virtual machine ( i am using VMware workstation in tutorial , if you have virtualbox or vmplayer then its good installation process is pretty same in every virtual platform )
Installation Process :
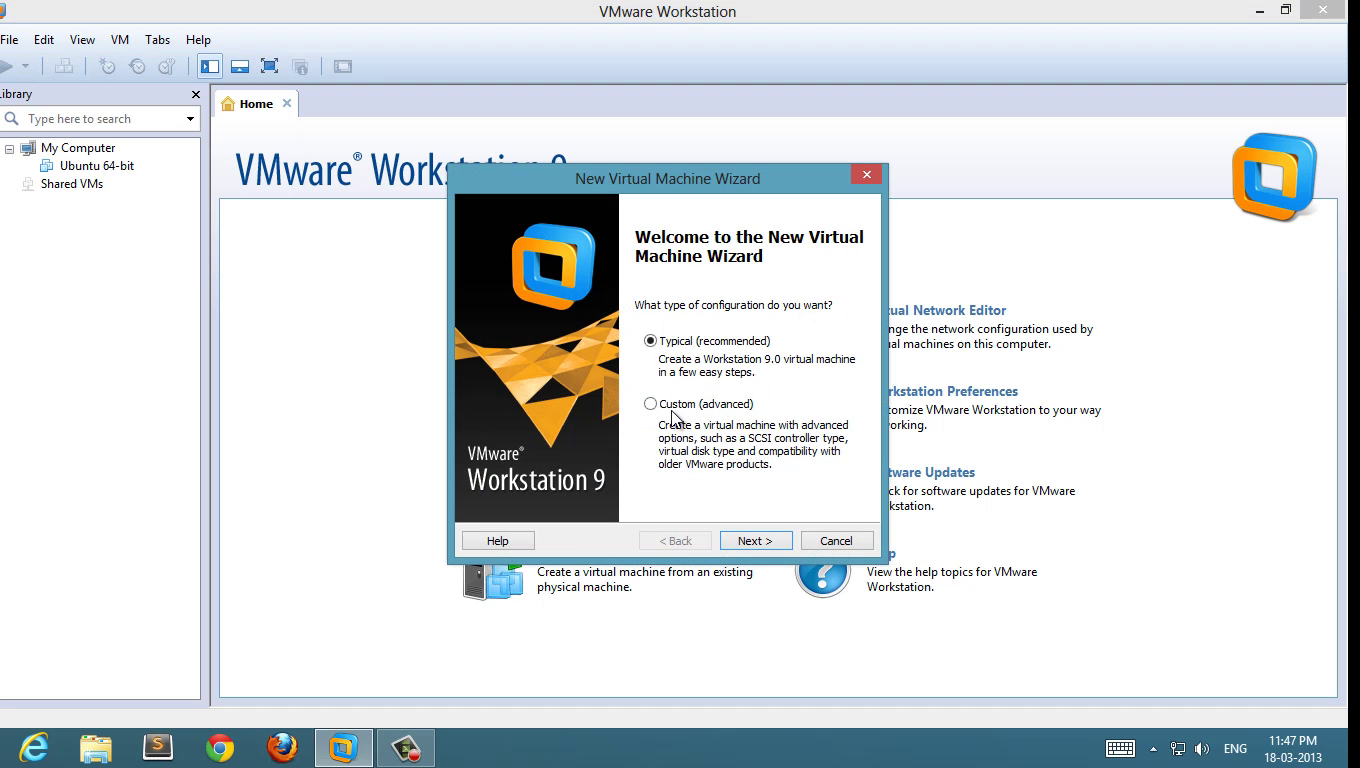
1 : click on create new virtual machine
2 : choose ISO
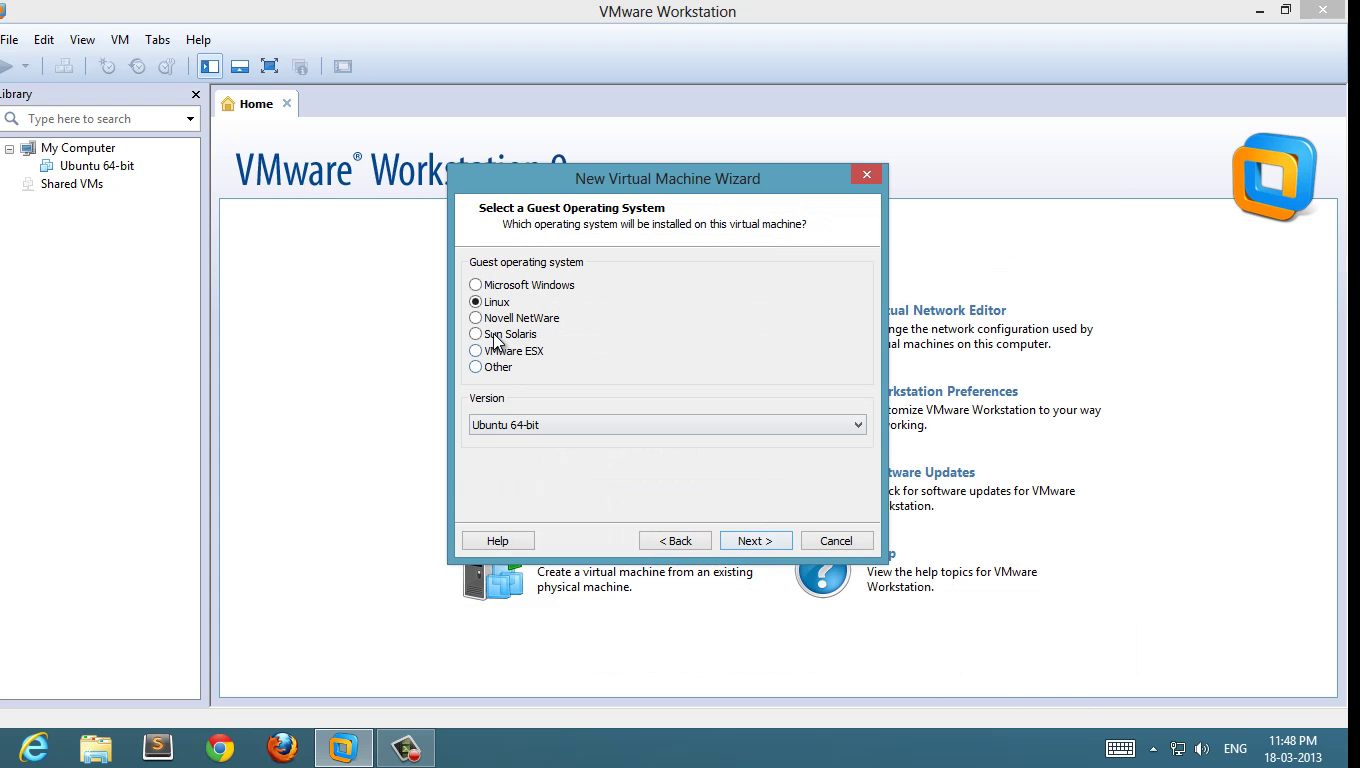
3 : Select Guest Operating System
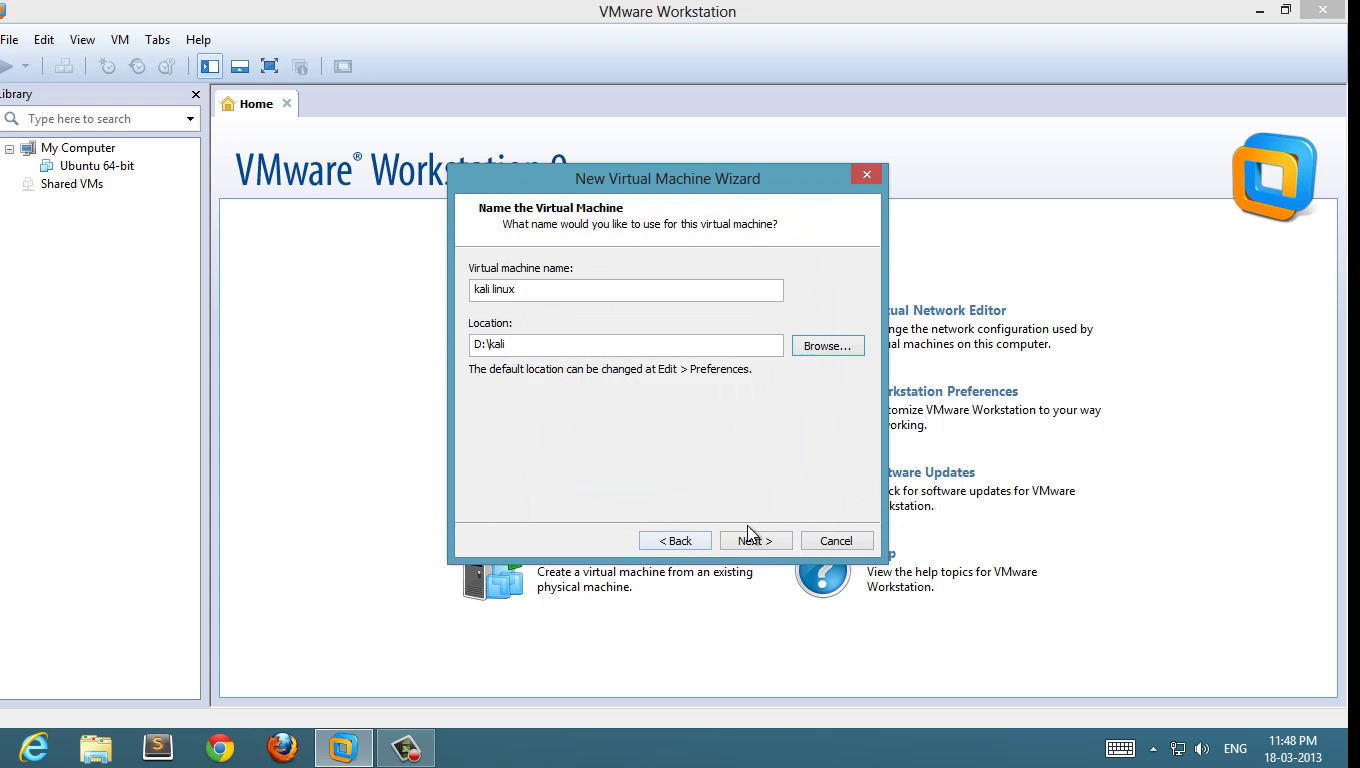
4 : Set name and location
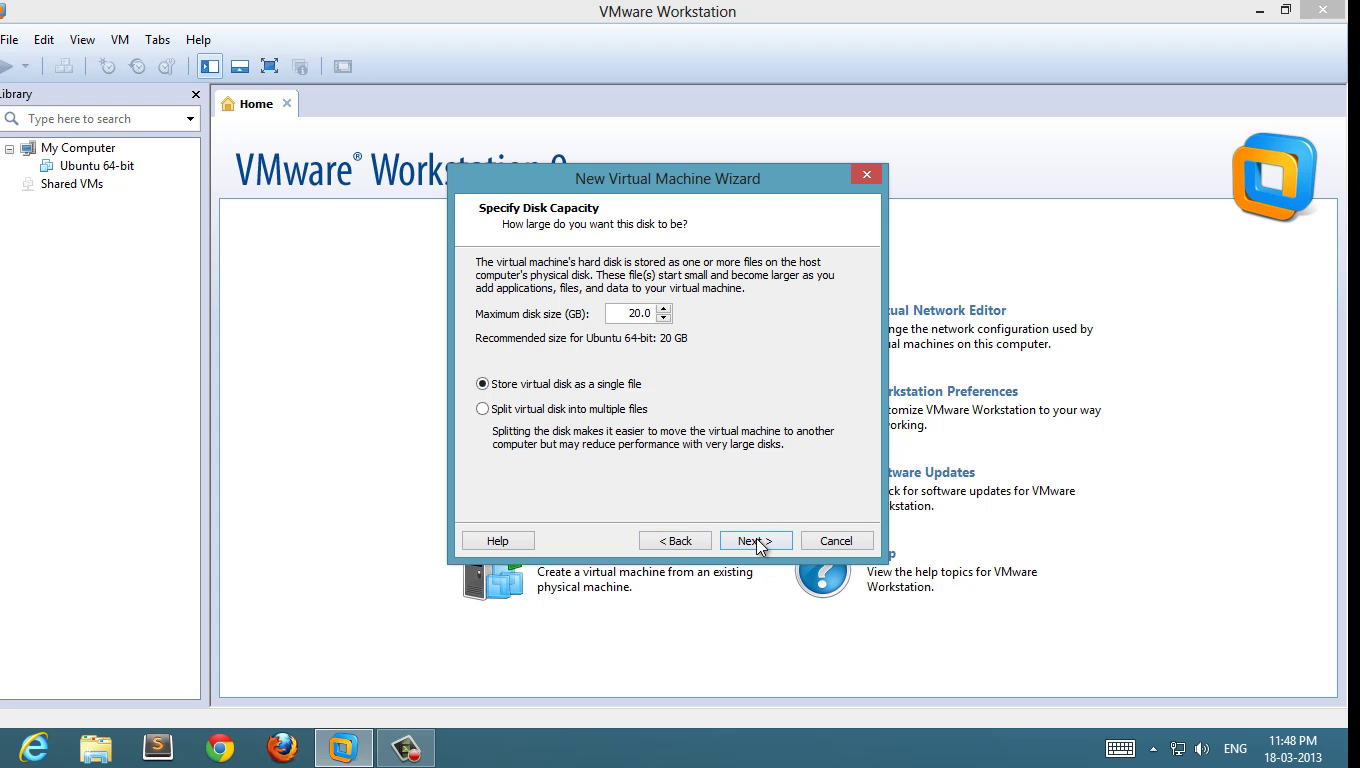
5 : Set disk space ( 20 GB is good enough, minimum 12 GB to work smoother )
5 : Review the hardware configuration and start the virtual machine
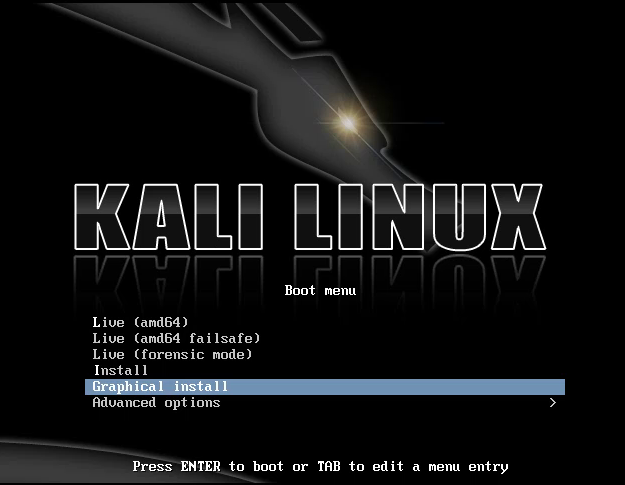
6 : Select Graphical Install go through normal language and timezone host-name selection etc
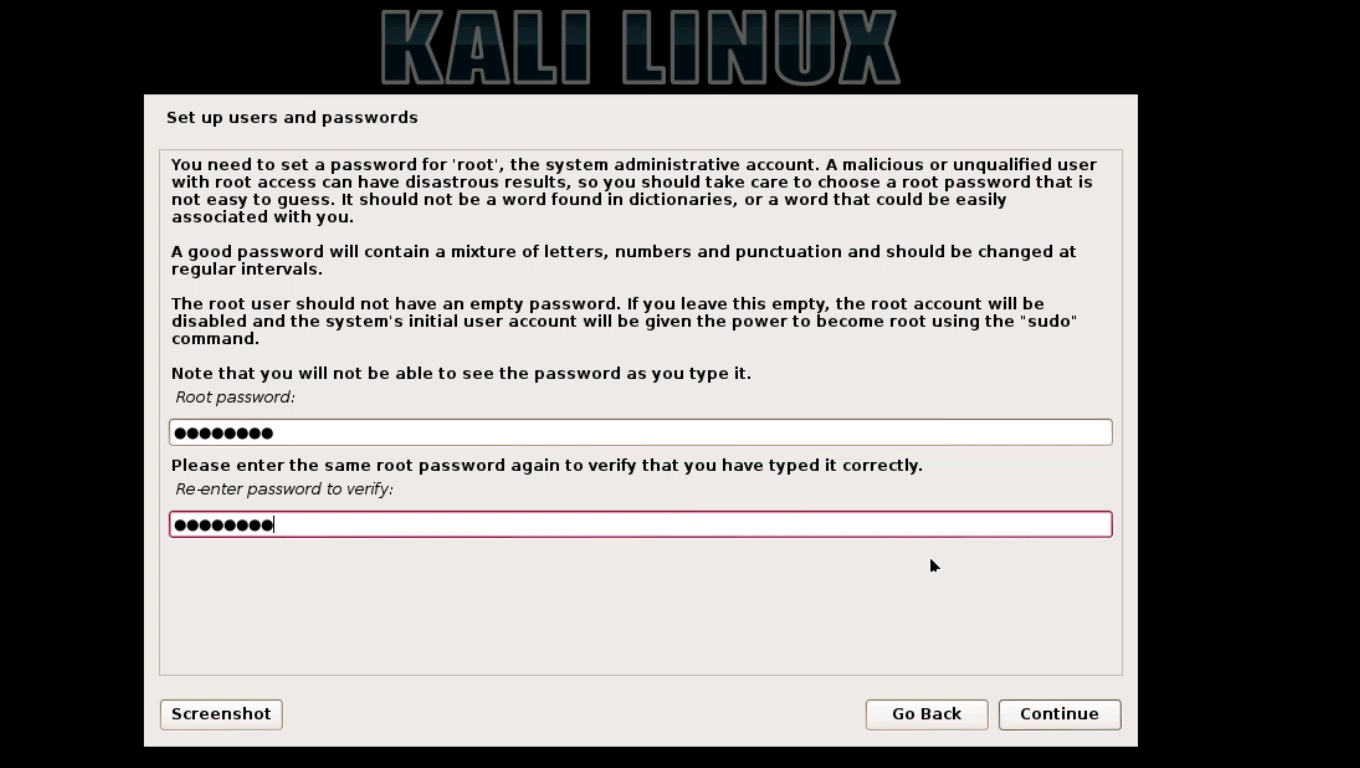
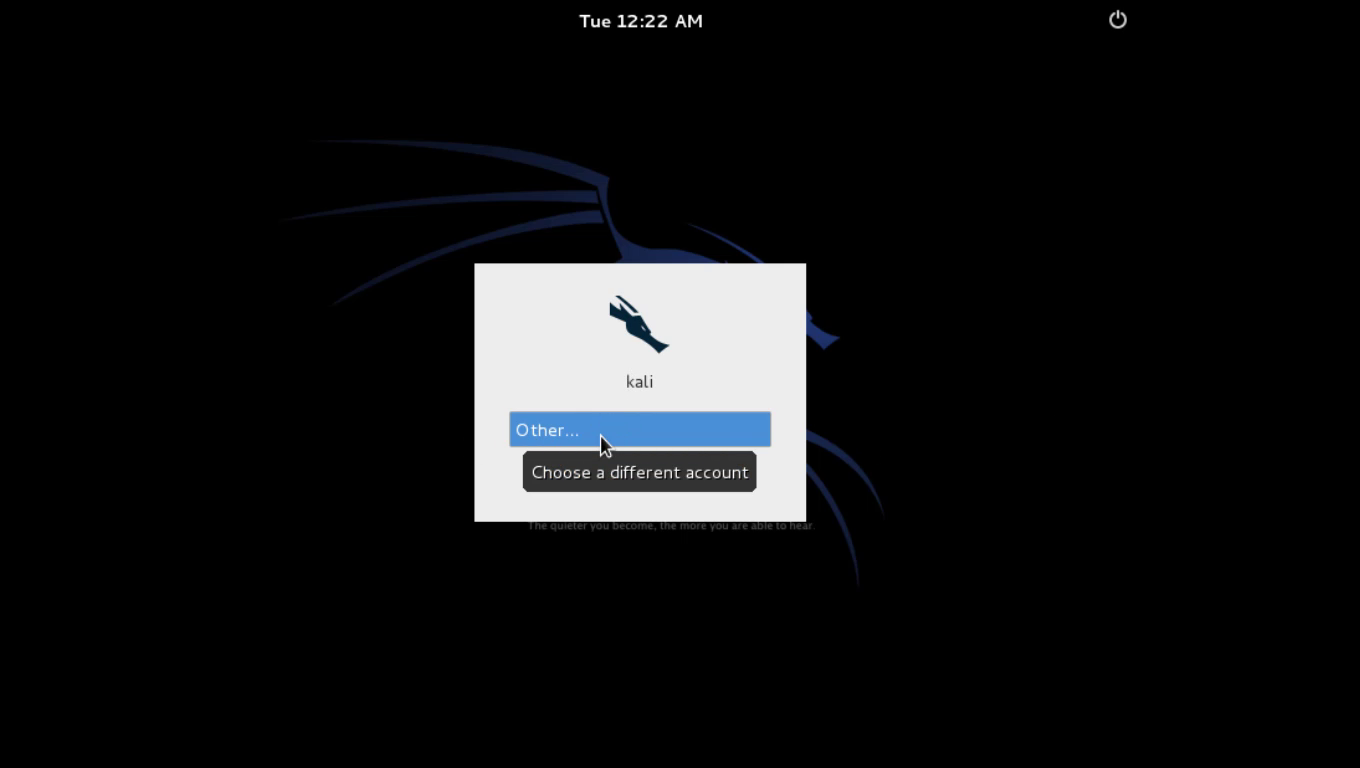
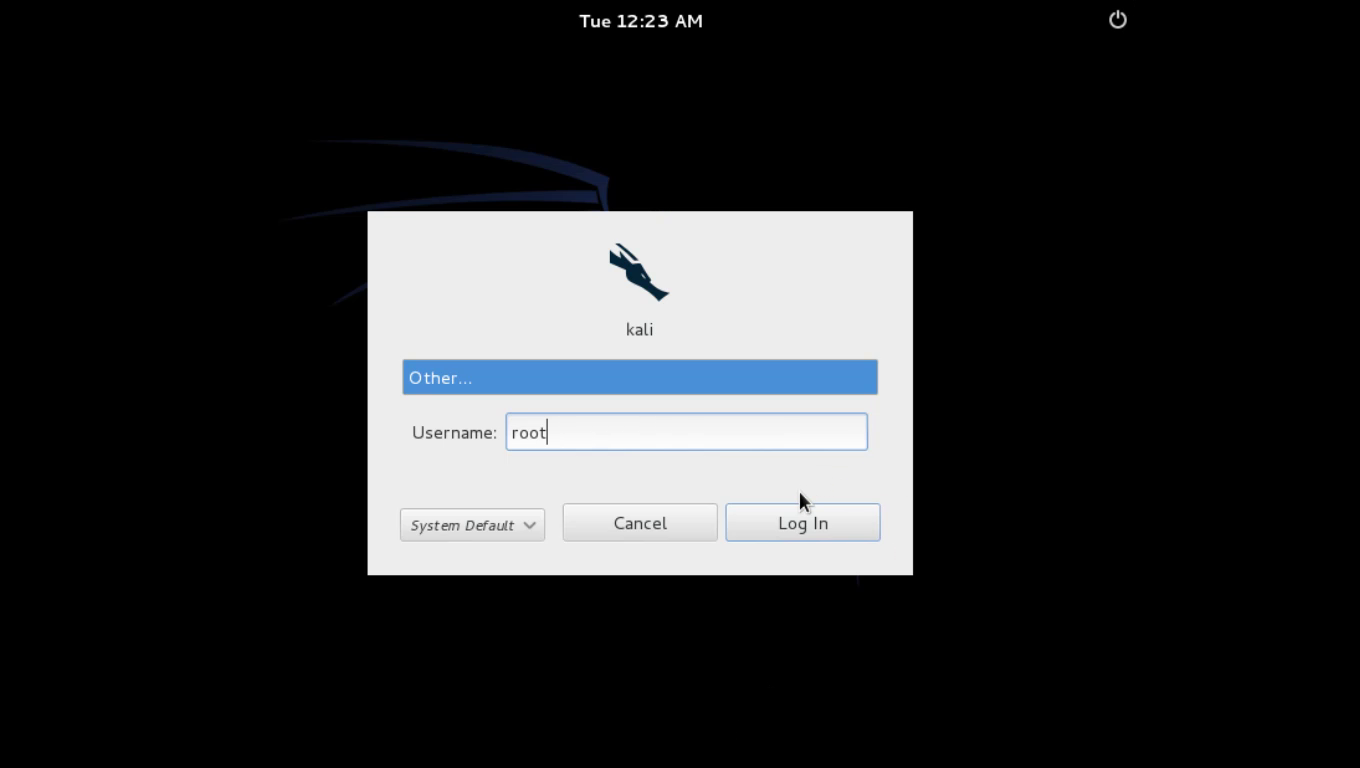
Set your “root” password and don’t forget it
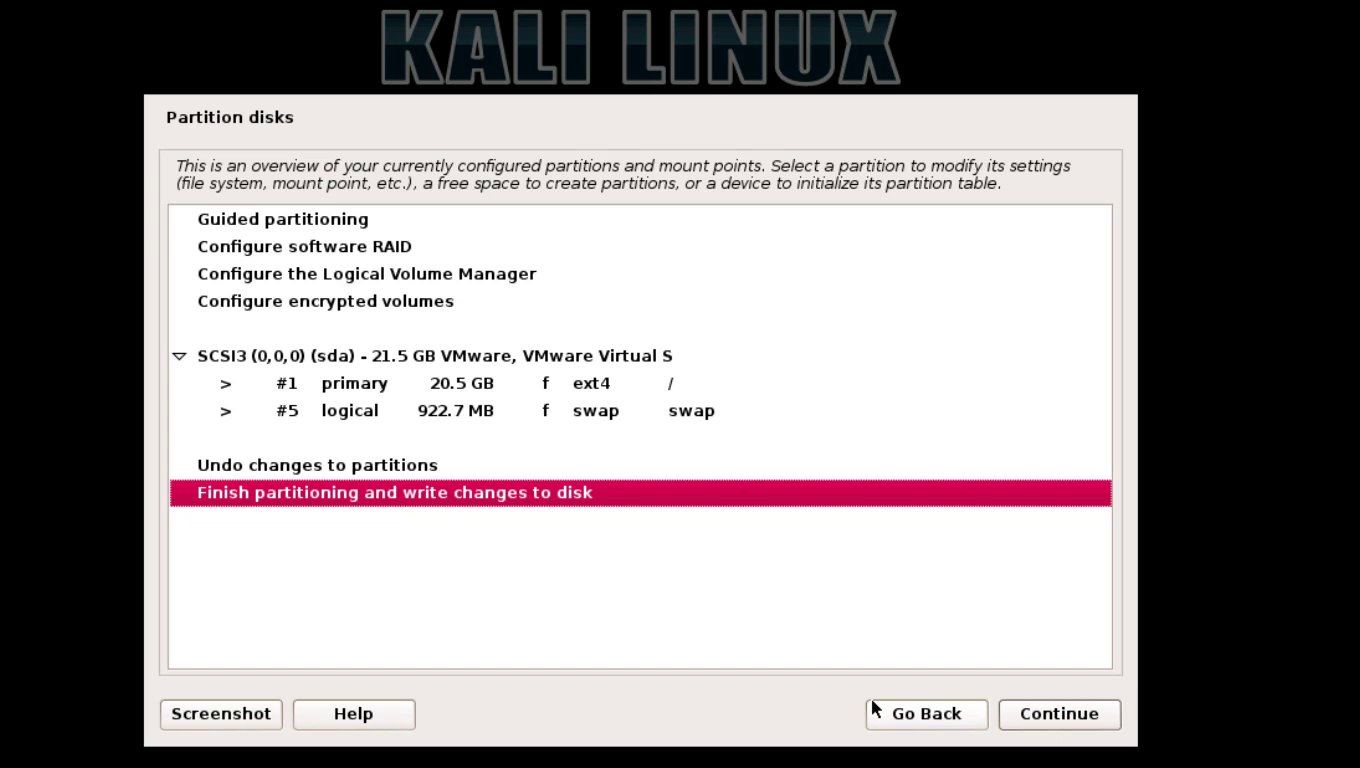
7 : Disk Partition ( if you are installing freshly without any dual boot then simply use guided and use full virtual disk )
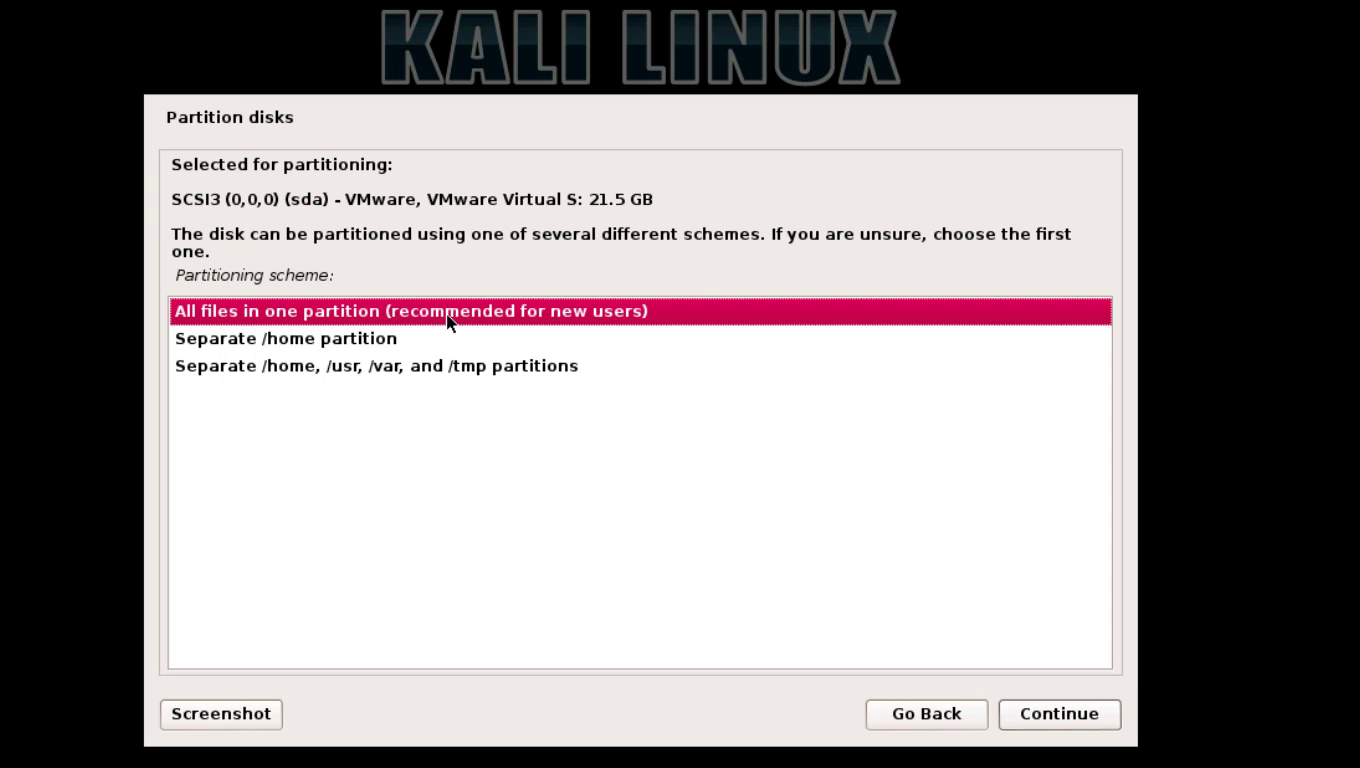
8: Select hard-drive and select all-in-one ( for new users ) or if you don’t know just choose all in one
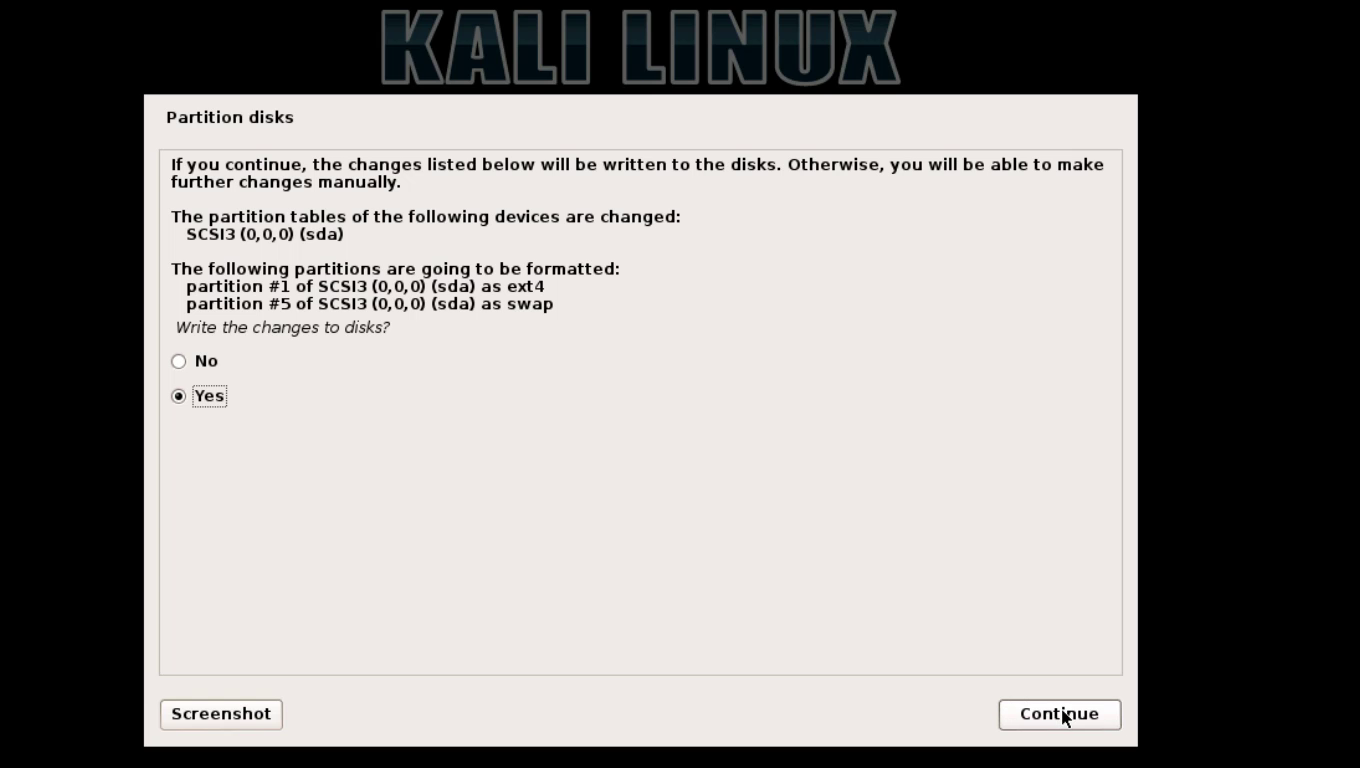
9 : click on finish partitioning and write changes to disk , choose yes to write
10 : wait until installer finish copying files setting system

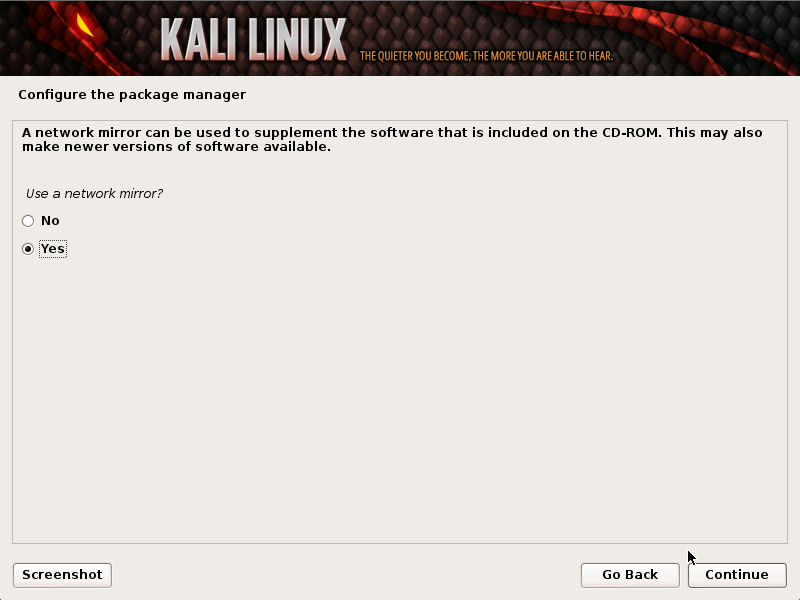
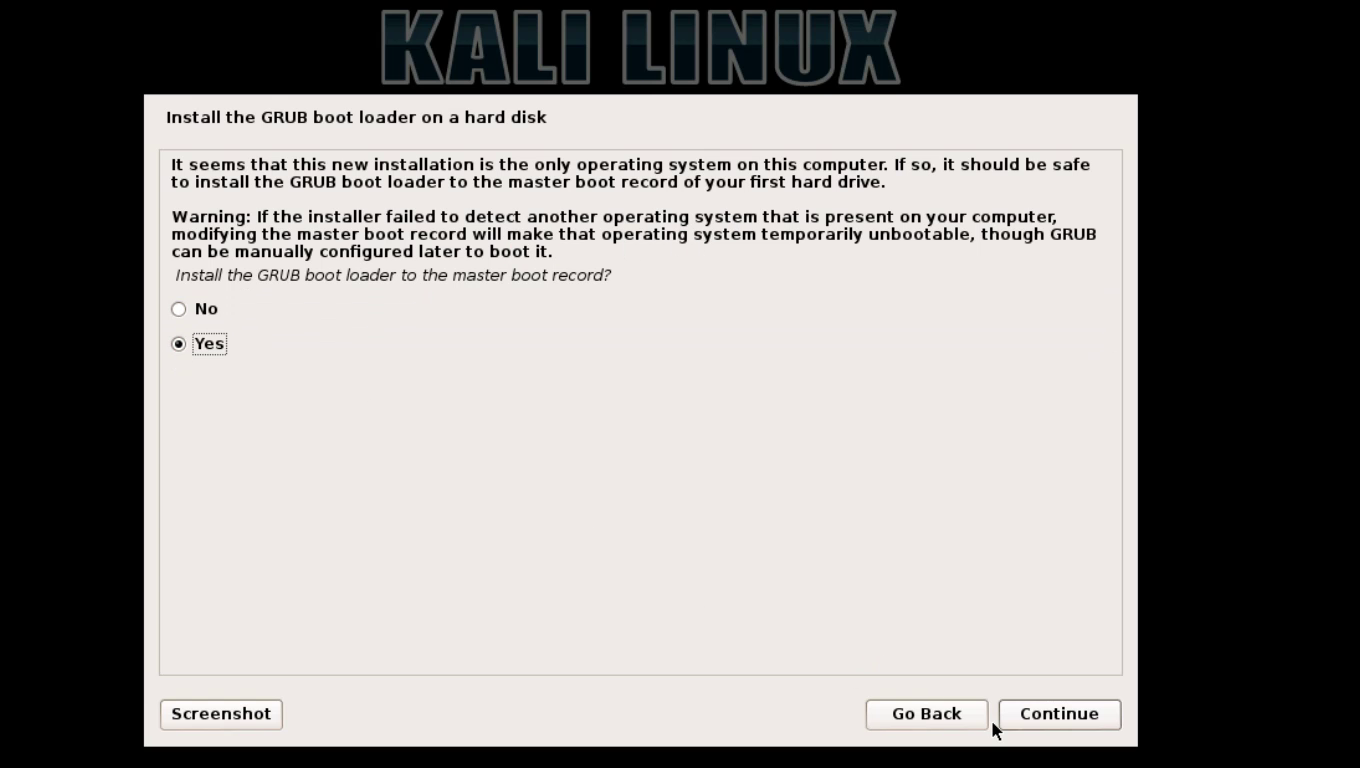
11 : set network mirror and set boot-loader ( very important )
12 : after installation restart and login with username ” root ” and password ( what you set at step 6 )
See Video tutorial